Welcome to SteadyWeb, your platform for precise solar and wind energy forecasts!
This comprehensive guide will walk you through your first steps: creating an account, configuring your site, and exploring key features. Whether you’re a beginner or an expert, you’ll discover everything you need to get the most out of SteadyWeb.
Throughout this page, you’ll find detailed instructions and screenshots to guide you at every step. For a more visual approach, we’ve also included a complete video tutorial.
Ready to start? Let’s go!
1. Creating an account and configuring your first site
Create a SteadyWeb account

Visit the registration page, enter the requested information, validate your email address, and you’re ready to go. You’re now logged in!
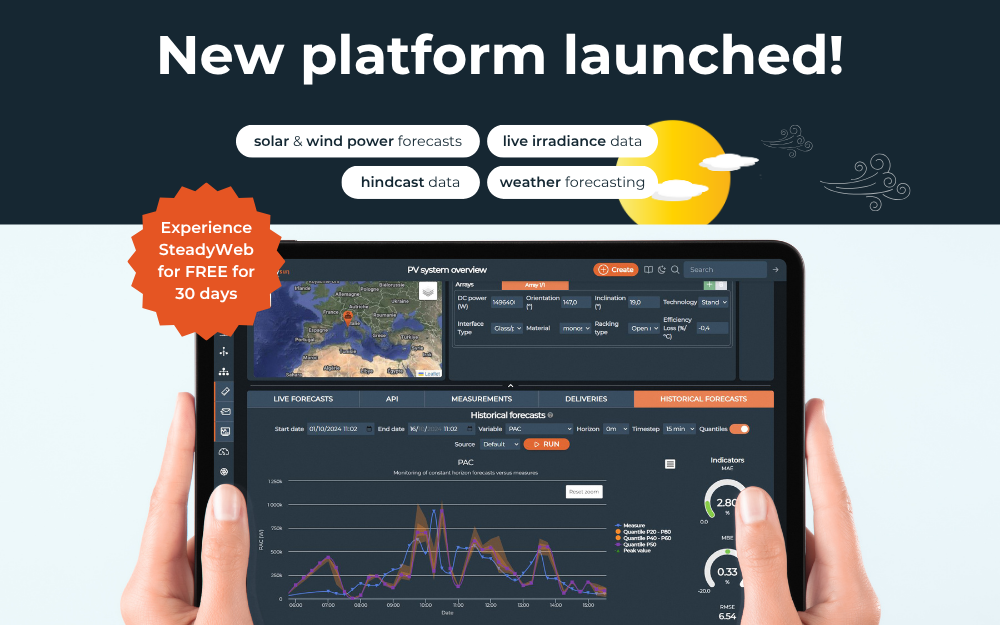
From the homepage, you’ll be able to choose the subscription that best suits your needs. Our platform offers a wide range of plans to suit various preferences and requirements.

However, if you’re not ready to commit yet, you can activate a free 30-day trial to explore all of SteadyWeb’s features without any restrictions or costs! That’s what we’re going to do in this tutorial.

By activating a 30-day free trial, we can explore all of SteadyWeb’s features (historical data, portfolio management, quantiles, etc.) and get detailed forecasts for 2 of our installations.
Configuring your first site

At this stage, the interface prompts us to create our first system.
Whether it’s for a solar, wind, or weather forecast, the process is designed to be quick and accessible, even for novice users. In just a few clicks, you can configure a system tailored to your specific needs.
➡️ To illustrate, let’s start by creating a solar power plant or (as we like to call it in the application) a photovoltaic (PV) system.
2. Refining site characteristics for more accurate forecasts
Step 1, we’ll provide the name of the power plant and its location. To specify its location, SteadyWeb offers you 3 simple methods:
- 📍Enter GPS Coordinates: If you know the exact coordinates of your power plant, enter the latitude and longitude directly in decimal degrees. This option guarantees maximum accuracy.
- 🗺️Use the interactive Map: For a more visual approach, click directly on the map to locate your power plant in a few seconds.
- 🏠Provide an Address: If you only have an address (even close to your site), enter it, and our geocoding tool will automatically convert this information into GPS coordinates.

Once this information is entered, SteadyWeb automatically calculates the altitude using a high-precision terrain model. If necessary, you can adjust this data manually, for example, to account for installations on a roof.
⚠️ Important: The location is final!
Once validated, the location of your site cannot be changed. Take care to verify every detail to ensure forecasts that are perfectly suited to your power plant.
Step 2, let’s move on to the detailed configuration to refine the forecasts. Its content will depend on the type of system selected (solar, wind, or weather).
And, once all the necessary information has been entered and validated, the system’s “Overview” screen will appear. It is divided into three sections: system summary / system properties / forecasts.

3. Exploring the system overview
Now that our system is configured, we’re directed to the system’s overview page, a key area for viewing, adjusting, and optimizing our installation’s settings.
The Overview is designed to be both intuitive and comprehensive. It brings together all the critical information about your installation in one place, allowing you to efficiently manage your forecasts while maintaining complete flexibility to adjust settings according to your needs.
Here’s everything you need to know to fully utilize this interface.
A. The “System Summary” panel

Located in the upper left corner, the “System Summary” panel provides a quick overview of your site’s essential information like :
- Unique ID: Note this identifier, as it will be essential for API integration.
- Key information: Location, altitude, peak power (if applicable), time zone, and more.
This is also where you can access quick actions, such as disabling or reactivating your system with a single click, perfect for temporary adjustments or planned maintenance.
B. The properties of the system

In the upper right corner, you’ll find a panel dedicated to system properties. This section allows you to adjust the parameters that directly influence the forecast model and its behavior, ensuring that they perfectly match your specific needs and preferences.
☀️For PV systems: refine installation characteristics (tilt, orientation, etc.) and choose whether or not to simulate forecasts using satellite data. Using satellite data can improve the accuracy of short-term forecasts.

🍃For wind systems: refine installation characteristics (roughness, obstacle height, whether or not turbines are defined) and the type of turbine(s)).

🛰️For a weather system: choose whether or not to simulate a forecast using satellite data. Using satellite data can improve the accuracy of short-term forecasts.

C. The forecasts

In the lower part of the overview, you’ll finally see the long-awaited detailed forecasts! These may take a few minutes to generate if the system has just been created.
Otherwise, a simple click on the refresh button will update the graphs without needing to reload the entire page.
For optimal navigation, you can minimize the top section of the dashboard to get a clearer and more immersive view of the graphs.
Additionally, the band with all the variables allows you to easily select the data to display, whether it’s all the data simultaneously or a specific variable. For example, for a solar power plant, (PAC) power output can be selected with a single click. And to simplify the experience, each variable is accompanied by a short description that appears when you hover over its button.

But now, let’s explore the graph on the left. You can see a complete view of the energy production forecast for the next 15 days; the red line illustrates the deterministic forecast, an accurate estimate of the expected production, and the colored areas in orange represent the quantiles.
Quantiles provide a clear vision of the different possible scenarios for your power plant’s performance. By integrating uncertainties and variations in real-world conditions, SteadySun’s forecast models use an advanced statistical approach to generate a range of accurate and reliable results. This method ensures a more nuanced understanding of potential performance, allowing you to plan confidently while taking into account unforeseen events.
For example, if you select the p20-p80 quantile, it means that:
🧮p20: there is a 20% chance that actual production will be below this value.
🧮p80: there is an 80% chance that actual production will be below this value.
This gives you a probabilistic understanding of your power plant’s expected performance. The range between p20 and p80 covers scenarios where actual production has a 60% chance of falling between these two limits. This zone gives you a fairly reliable idea of probable production and allows you to anticipate variations with a good level of confidence.

The graphs are fully interactive: click on a series in the legend to highlight or hide it. If you want to compare multiple series, use the Ctrl key while selecting your preferences.
4. Integrating your actual measure
Want to verify the accuracy of our forecasts for a specific day, like last Tuesday? SteadyWeb allows you to analyze the performance of your installations by comparing generated forecasts with your actual measurements. Here’s how:
A. Upload your actual measurements
To begin, make sure to upload your measurement data using our API. If you’re new to the API, don’t worry: a detailed tutorial will be available soon to guide you. For now, let’s assume your measurements have already been uploaded.
B. Analyze your historical forecasts
Access the “Historical Forecasts” tab to explore your system’s past performance.
- Select a time range to analyze.
- Choose a variable you’re interested in, such as energy production or wind speed.
- Specify the horizon, or lead time — the amount of time ahead the forecast was generated. As you might expect, forecasts tend to be more accurate with shorter lead times and less so with longer ones.
- And Run! Prioritize these values. Others can be explored further based on your specific requirements.

5. Evaluating the performance of our forecasts
Forecast accuracy is evaluated using three key indicators. These metrics allow you not only to assess forecast quality but also to identify areas for improvement to optimize your system.

- Mean Absolute Error (MAE) : Measures the average deviation (or difference) between forecasts and actual measurements. The lower the MAE, the more accurate your forecasts.
- Mean Bias Error (MBE) : Helps us understand the trend of errors: Do forecasts consistently overestimate or underestimate actual values? A positive MBE indicates that forecasts tend to overestimate energy production, while a negative MBE shows a tendency to underestimate results.
- Root Mean Square Error (RMSE) : Measures the magnitude of deviations between forecasts and actual values, assigning more weight to larger errors. A low RMSE indicates better accuracy, especially for extreme production values.
These metrics help you assess the reliability of forecasts and identify trends in their performance over time. They allow you to adjust your models based on results and optimize your strategy for increasingly reliable forecasts.
6. Manage your portfolio
Portfolio management is a crucial aspect of optimizing your system’s performance.

If you notice a discrepancy between forecasts and actual results, or if you want to adjust certain parameters to improve efficiency, you can easily do so in the upper right corner of the “Properties” panel. Simply select the parameter you want to modify, enter the new value, and save the system.
Important : Note that adjustments made to your system may take a few minutes to be reflected in the forecasts. With a little patience, you’ll find it easy to fine-tune your system for optimal results.
By regularly optimizing these parameters, you can refine the accuracy of your forecasts and improve the overall performance of your portfolio. Whether it’s a single site or a group of installations, SteadyWeb allows you to easily track and manage all your systems in one place, ensuring a clear overview and increasingly reliable forecasts.
7. Using the Steadysun API to retrieve forecasts and manage your portfolio from your tools
To take things further, our API allows you to integrate data directly into your management tools.
A. Obtain your API key
To access data via the API, you must first obtain an API key, a unique identifier that allows you to authenticate your request and verify your access rights. This key is essential for any interaction with the API and allows you to track your requests while ensuring the security and integrity of your account.
Here’s how to obtain and use your API key in a few simple steps:
- Go into “API” section
- Enter the API key given to you into ”Headers”
- Click on ”Submit query”
B. Secure and utilize your data
It’s crucial to keep your API key private and secure. Never share this key, as it allows access to your sensitive data and could compromise the security of your account.
Once you have the API key, you can interact with the API to retrieve the data you need and integrate it into your management tools, monitoring systems, or any other decision-making process.
C. Explore the possibilities with the API
With your API key in hand, it’s time to start exploring the API’s capabilities and requesting the data you need for your projects.

🎉And that’s it! You know it all!
You can also find this tutorial in video format!
🎥👉 Getting started with SteadyWeb: A step-by-step tutorial
Don’t forget to explore our other topics, check out the documentation, browse the FAQ, and share this guide.
Stay connected by following Steadysun on social media for updates and exciting new features!
If you need further assistance, contact our support team anytime.